Instructions for Integrating Jotform with Positly
Updated: 10, Wed, 2024 08:16 AM
To ensure that Jotform and Positly are connected, there are three important things for you to do:
A. Set up Jotform to receive values from Positly
You need to set up Jotform to receive the corresponding values that Positly will automatically pass into it. To do this, you need to add text fields for each value that you want Positly to pass in. The first section of this document will explain how to do this step by step:
- Start by choosing which values you would like to pass through from Positly to Jotform.
- First, log into the Positly app (https://app.positly.com/#/users/sign-in).
- Open the Run that you are going to connect to Jotform.
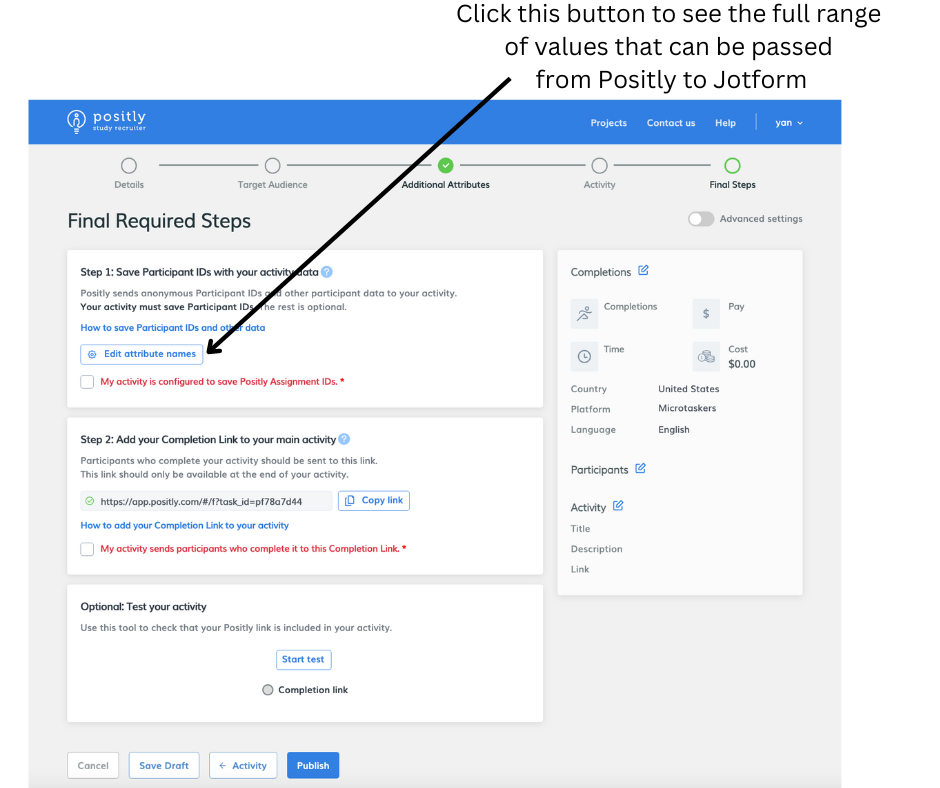
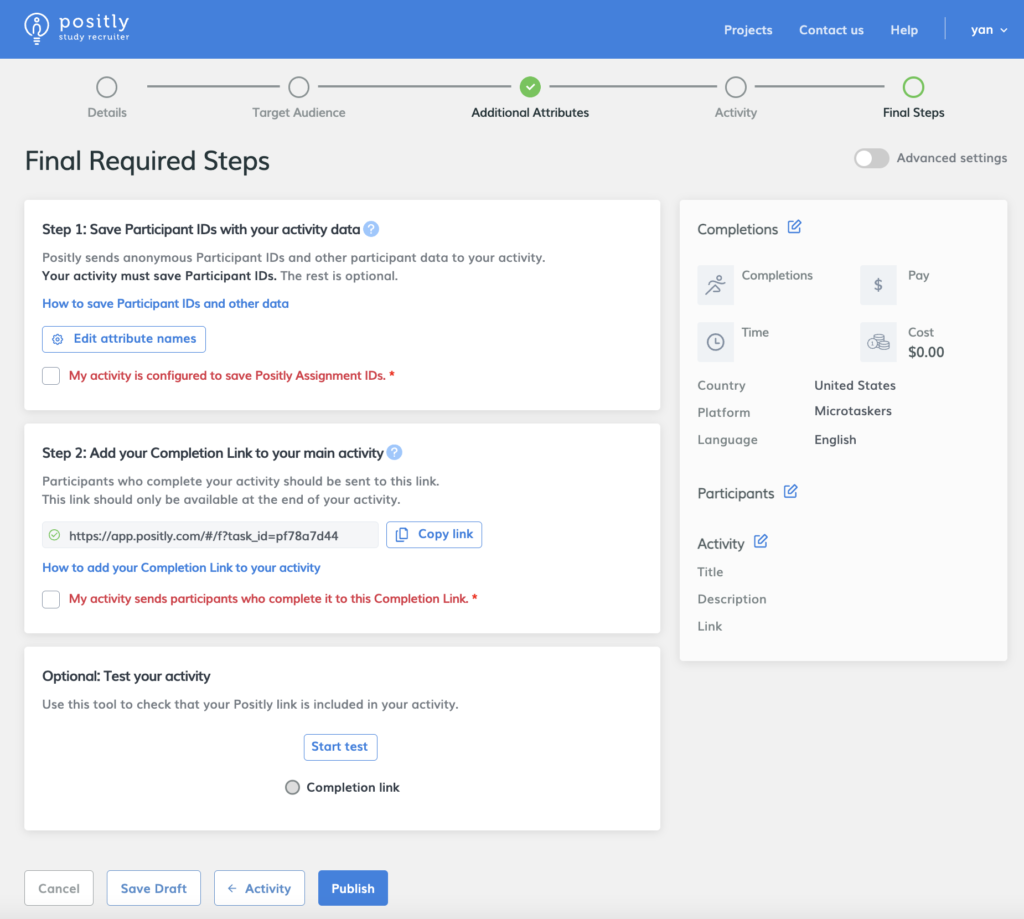
- Navigate to the last page of the Positly app, called “Final Required Steps”.
- Here you will find the “Edit attribute names” button. Press it (See screenshot below).

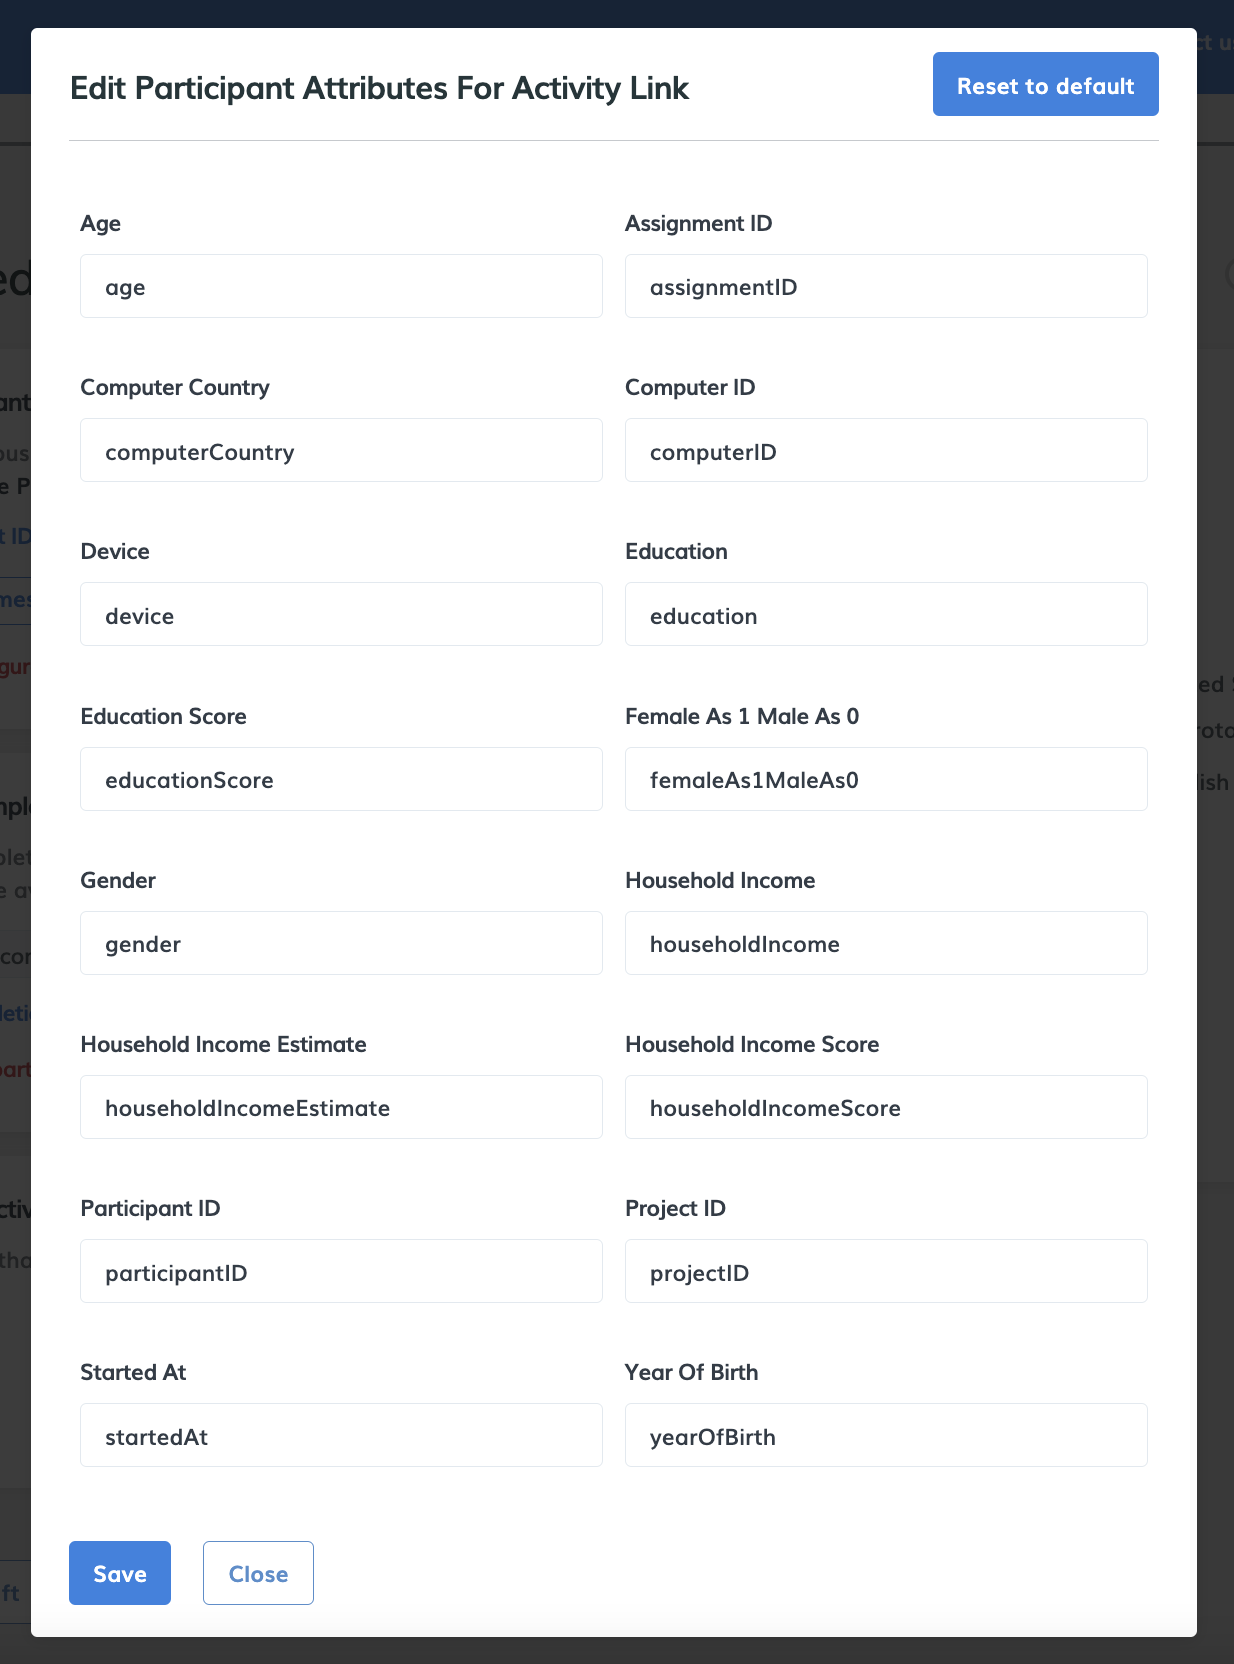
- Once you press the “Edit attribute names” button, you will see the below modal appear. The modal window shows a full list of values that can be passed from Positly to Jotform. Make a note of all the values you want to pass from Positly to Jotform.
- We strongly recommend “assignmentID” and “participantID” as a minimum.
- The spelling will need to be passed through exactly, so copying and pasting will require care!

- Once you know which values you want to pass through (in addition to “assignmentID” and “participantID”), go to the Jotform form you want to use with Positly.
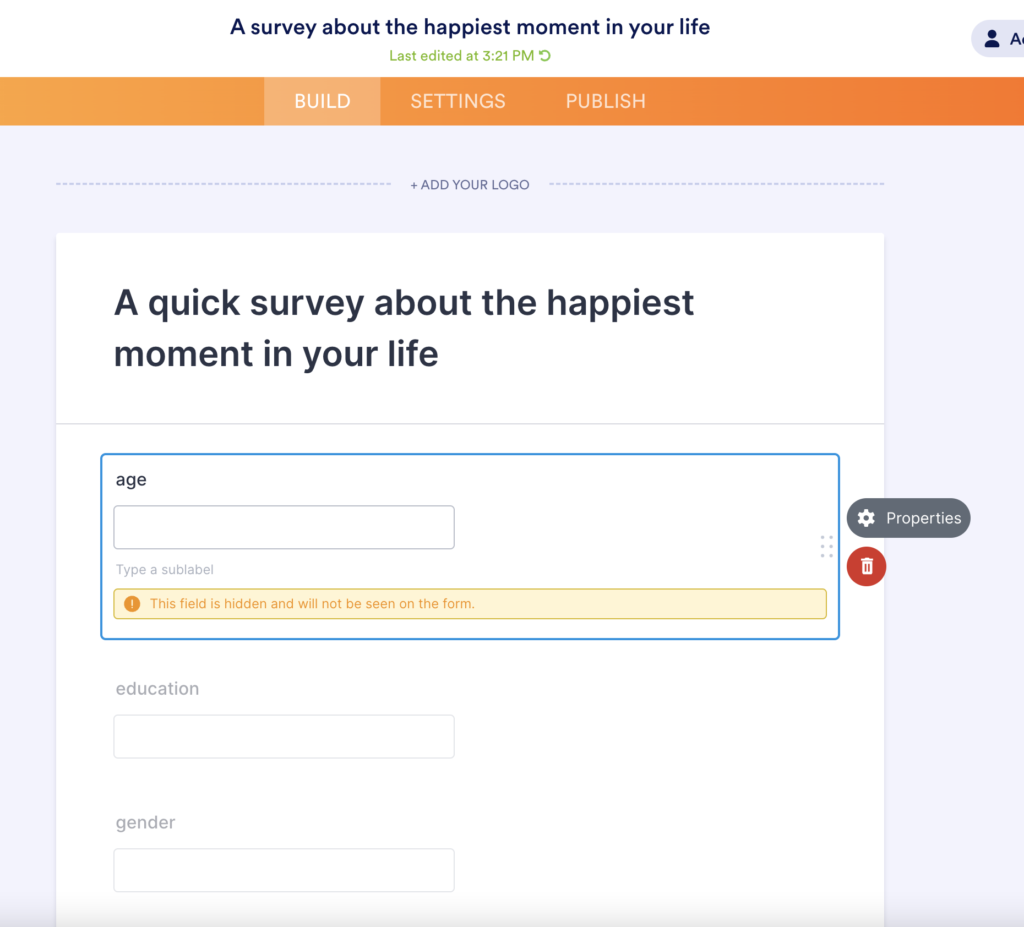
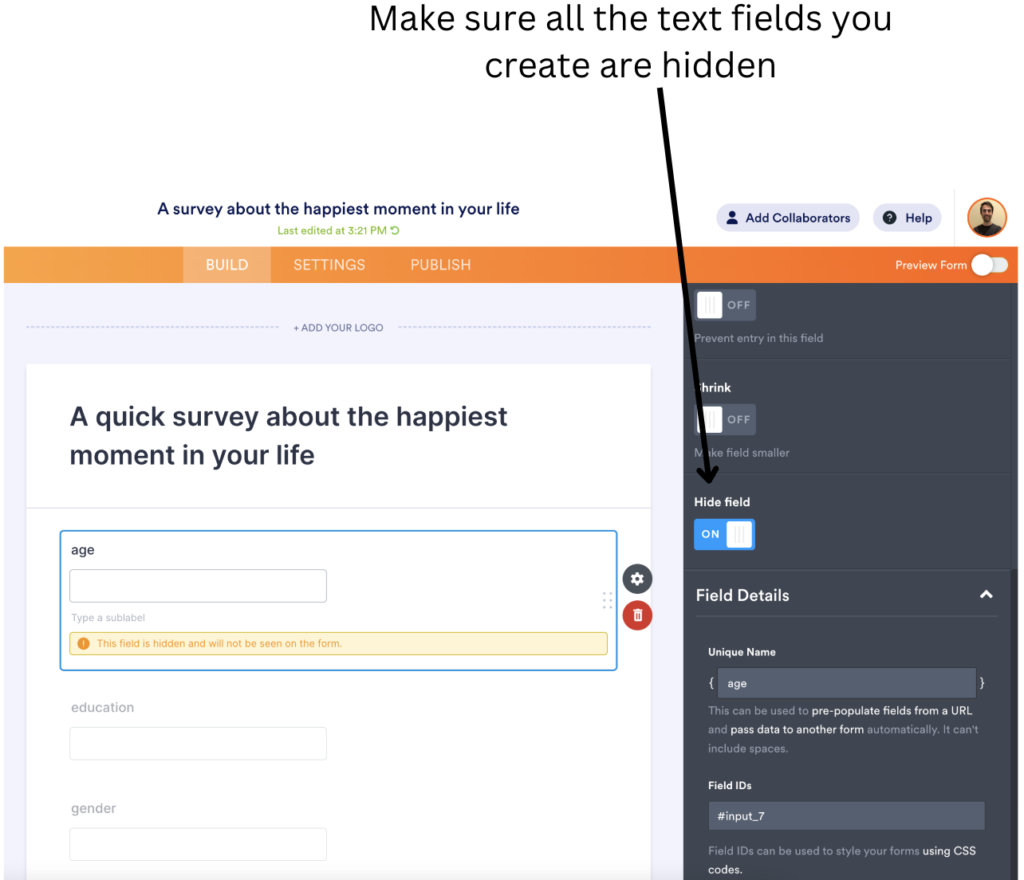
- Create a text field for each value you want Positly to pass in. In the example below, I have added “age”, “education”, and “gender”.
As mentioned earlier, it is crucial that the spelling of the text field exactly matches Positly’s (e.g., capitalization and spacing must be exactly the same) shown in the modal above. If it doesn’t, the data won’t be passed through. - Next, open the “Properties” gear icon shown below (for each text field you’ve created to pass values between Positly and Jotform – See screenshot below).

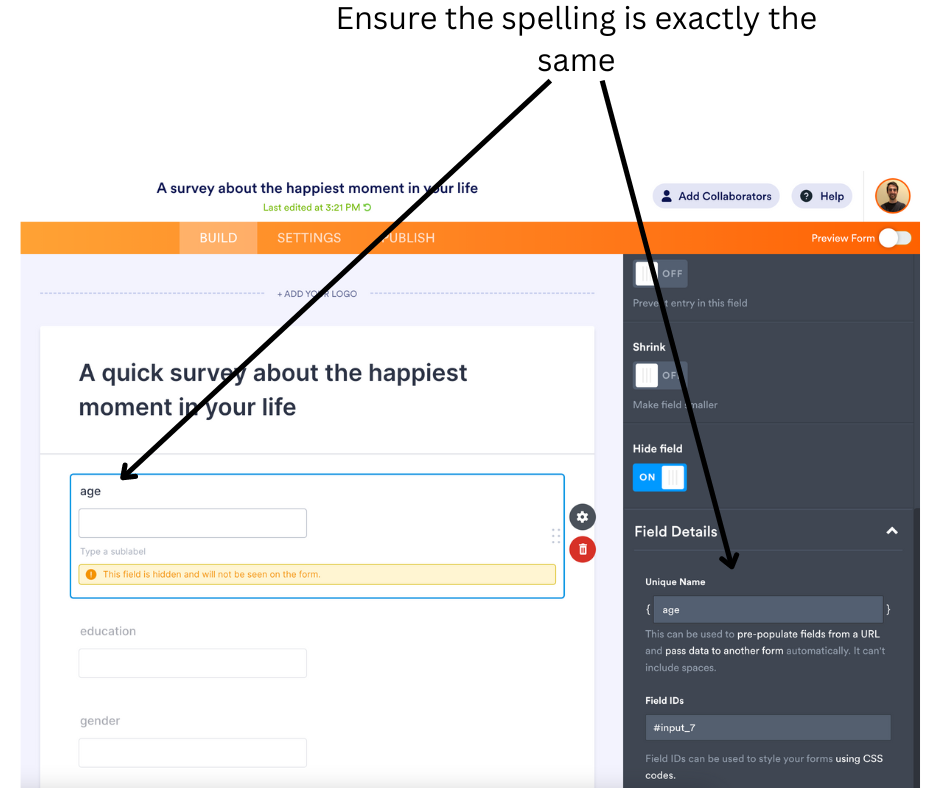
- Once you click the gear icon, go to the “Advanced” tab and scroll to the bottom (See screenshot below).
- Open “Field Details” and ensure that the “Unique Name” field also exactly matches the spelling on Positly (See screenshot below).
- Then set the text field to “hidden” (for each text field you’ve created to pass values between Positly and Jotform – See screenshot below).

- Repeat this process for all the values you want to pass through from Positly to Jotform.
- Create a text field for each value you want Positly to pass in. In the example below, I have added “age”, “education”, and “gender”.

B. Give Positly participants access to your form
Connecting Positly with Jotform requires you to give Positly participants access to your Jotform form. Below are the steps to do this:
- Open your Jotform form.
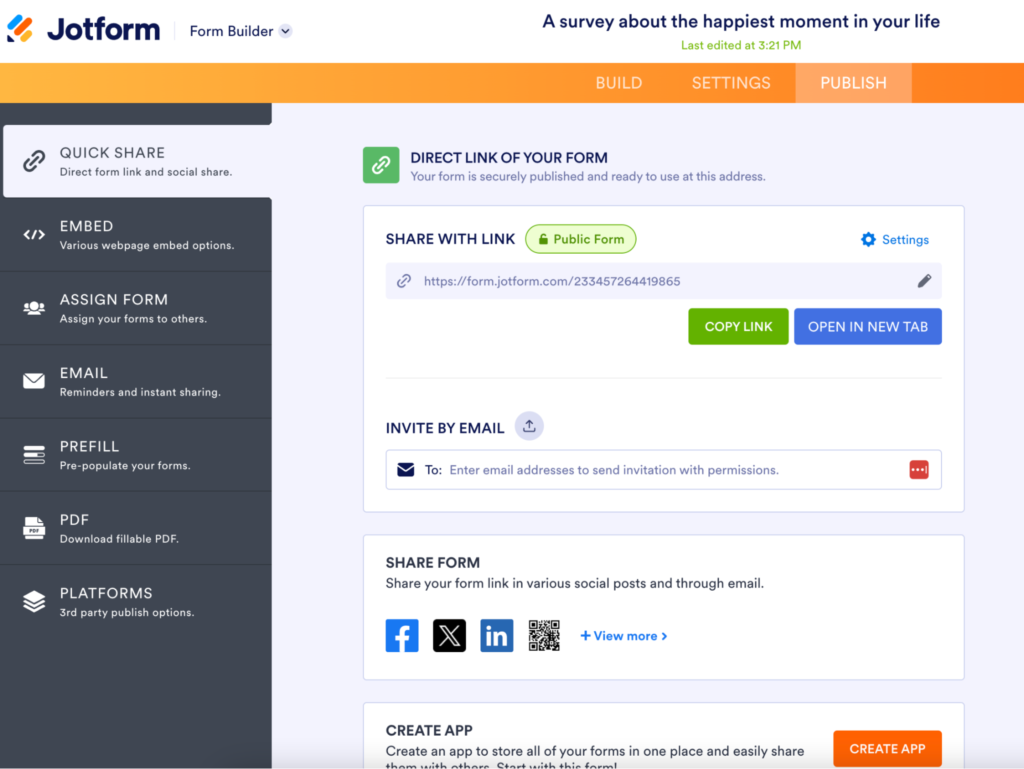
- Select the “Publish” tab.
- Ensure it is set to “Public”.
- Copy the link provided (See screenshot below).

- Open the Positly run you want to connect to your Jotform form.
- Navigate to the “Activity” page.
- Paste the link in the “Activity link” section (See screenshot below).


C. Making sure Positly participants are paid
You will also need to make sure that Participants are paid for completing your Jotform form. This is pretty straightforward:
- Start by going to the final page of the Positly app, “Final Required Steps”.
- Copy the completion link (See screenshot below).

- Open your Jotform form.
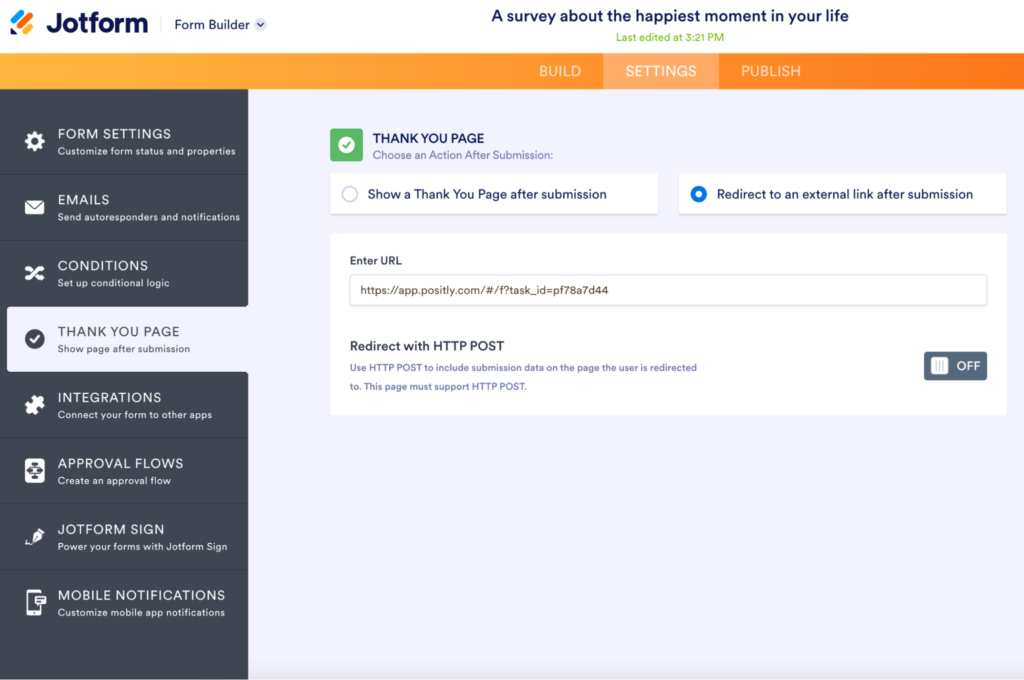
- Navigate to settings.
- Select “Thank You Page”.
- Select “Redirect to an external link after submission”.
- Paste the Positly completion link (See screenshot below).

Helpful?

 (No Ratings Yet)